
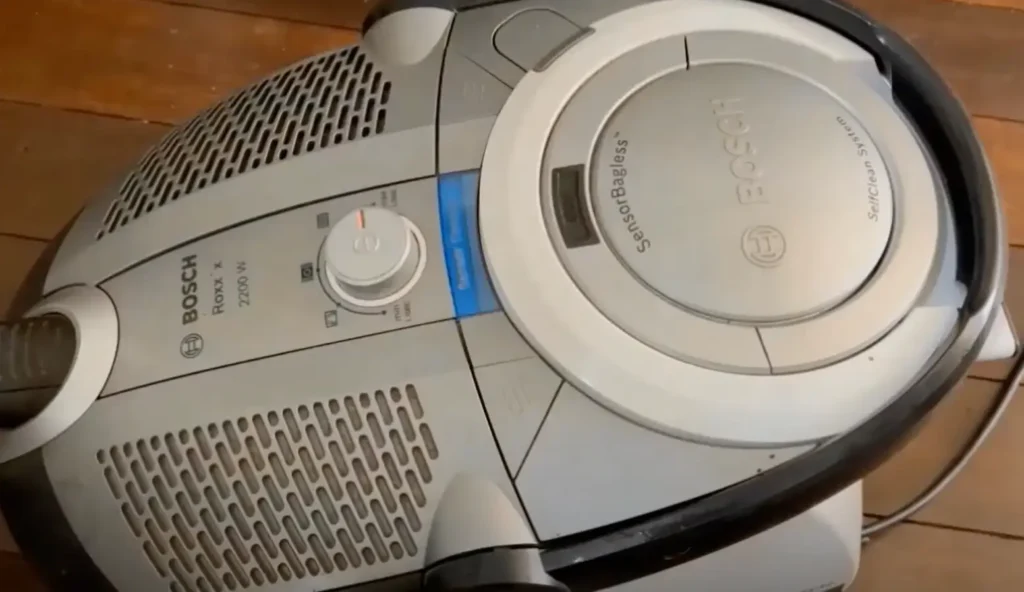
Is your LG refrigerator motor noise driving you crazy? I’ve been there too. After countless sleepless nights, I decided to take action.
I researched extensively to find the root causes and solutions. Turns out, there are several reasons for that annoying hum or buzz. From faulty compressors to loose parts, the culprits vary.
But don’t worry, I’ve got you covered. In this guide, I’ll share practical tips to silence your fridge. You’ll learn quick fixes and when to call a pro.
Ready to reclaim your peace and quiet? Let’s dive in.
Key Takeaways:
- Main noise sources: compressor, condenser fan, evaporator motor
- Check for proper leveling and temperature settings
- Clean condenser coils regularly
- Replace faulty parts when necessary
- Preventive maintenance helps avoid issues
What Causes Motor Noise in an LG Refrigerator?
Compressor noise
Check the Compressor Type
- Linear Compressor: Look for an insignia on the control panel. These adjust speeds for efficient cooling but can be noisier due to speed changes.
- Standard Compressor: Normally makes a low buzz or hum. If it gets louder or you can hear it from another room, there might be a problem.
Determine if the Noise is Normal
- Some noise is normal: low buzzing or humming during operation.
- If the compressor speeds up, it may buzz, knock, or bang.
- Noise lasting over an hour needs checking.
Check for Proper Leveling
- An uneven fridge makes the compressor work harder, causing more noise. Ensure it’s level and the doors are aligned.
Adjust the Temperature
- Setting the fridge too cold causes frost buildup, making the compressor louder. Raise the temperature slightly for a few days to reduce noise.
Clean the Condenser Coils
- Dirty coils restrict airflow, making the compressor louder. Unplug the fridge and clean the coils with a vacuum brush.
Condenser fan motor noise
Unplug and Prep: First, unplug your fridge and turn off the water supply. Safety first!

Remove Panel: Unscrew the six Phillips-head screws to take off the lower rear access panel.
Fan Blades Off: Use pliers and a flathead screwdriver to gently pry the fan blades off the motor shaft.
Motor Bracket: Unscrew the motor mounting bracket using a short Phillips head screwdriver.
Disconnect Motor: Unplug the condenser fan motor wire harness.
Remove Old Motor: Open the bracket and lift out the old motor.
Transfer Mounts: Move the rubber mounts from the old motor to the new one.
New Motor Prep: Feed the new motor’s wire harness through the hole in the bracket.
Install New Motor: Hold the bracket open, position the new motor, and reconnect the wire harness.
Secure New Motor: Screw the bracket back to secure the new motor.
Attach Fan Blades: Slide the fan blades onto the new motor shaft.
Replace Panel: Realign the refrigerator door and screw it back on.
Reconnect: Turn the water supply back on, plug in the power cord, and check if the fridge is working.
Evaporator motor noise
Check if the noise is inside the fridge; it might be the fan or evaporator motor.
A loud hum or buzzing? Fan might be broken or making noise.
Clicking or tapping? Could be the evaporator motor.
Get professional help for repairs.
Dripping noise outside? Look at the water line or ice maker.
Check for leaks, kinks, or clogs. Turn off water supply if needed and call a pro.
Vibrating noise? Ensure the fridge is level and stable.
Leave space between fridge and wall to reduce vibrations.
Clean condenser coils regularly.
Ensure good air circulation around the fridge.
Check for worn or damaged parts.
Frost buildup causing noise? Raise the temperature slightly for a few days.
Make sure the fridge is level to prevent frost buildup around the fan.
Check door alignment to avoid moisture and frost problems.
Improper leveling
Improper leveling of an LG refrigerator can cause noise issues. Here’s how to identify and fix it:
Identifying the Problem:
- Compressor Noise: Normal operation, but if it’s too loud, it needs repair.
- Fan Noise: If the noise stops when doors are opened, it’s likely frost buildup around the fan housing, fixable by leveling and adjusting the temperature.
Fixing the Issue:
- Open the Doors:
- Check Level: Use a level on top of the fridge. If you don’t have one, fill a glass halfway with water and place it on top to see if it’s even.
- Adjust Legs: Tilt the fridge slightly backward by adjusting the legs.
- Check Door Alignment: Ensure doors are aligned to prevent moisture and frost buildup.
A small tilt helps with door closure, but too much can cause door issues. Adjust gradually!
Temperature too low
If your LG fridge is freezing your food, the temperature setting is probably too low. Aim for 37°F to 40°F for the best results. If it’s colder, stuff inside the refrigerator will freeze.
Recommended Temperature Setting
Set your fridge to a warmer temp to stop food from freezing. Check and adjust the settings as needed. If you’re not sure what temp to use, check the user manual or reach out to LG support.
I once had this issue, and simply adjusting the temp fixed it right away.
How to Diagnose Motor Noise in an LG Refrigerator?
1. Check the Evaporator Fan Motor
To diagnose motor noise in your LG refrigerator, focus on the evaporator fan motor, which helps keep the fridge at the right temperature.
Here’s a quick guide:
Symptoms:
- Fridge running too warm
- Loud noise when running, which might be a sign to request a repair from LG USA support.
Tools:
- Phillips screwdriver
- Flathead screwdriver (big and small)
Replacement Part:
- LG Refrigerator Evaporator Fan Motor 4681JB1029A (replaces older parts like EAU60694507, 1330410, etc.)
Steps:
Step 1: Unplug the fridge or turn off the circuit breaker for safety.
Step 2: Open the freezer door and take out the shelves to reach the back panel.

Step 3: Remove the light lens and bulb.
Step 4: Unscrew and remove the duct at the top of the freezer.

Step 5: Access and replace the evaporator fan motor with the new one (4681JB1029A).

Step 6: Put everything back together in reverse order.
I’ve had to do this myself, and it’s pretty straightforward if you follow these steps!
2. Inspect the Condenser Fan Motor
If you wanna check the condenser fan motor in your LG fridge, here’s a quick guide:
- First thing, unplug the fridge. Safety first!
- Take off the rear access panel, it’s usually at the bottom back, near the compressor.
- Look at the fan blades – make sure they’re not blocked and can spin easily. If they don’t spin well, the motor bearings might be worn out.
- Use a multimeter to see if the motor’s getting the right voltage (it should say on the motor). If it’s getting power but not running, you probs need a new motor.
- To dig deeper, disconnect the wires and check for continuity in the motor windings with the multimeter. No continuity means the motor’s shot.
- If the motor’s fine but your fridge still ain’t cooling, other parts like the compressor, thermostat, or control board might be the issue.
- If the motor’s busted, replace it with a compatible one, like the LG Electronics 4681JB1029B.
3. Examine the Compressor Motor
Checking the compressor motor in an LG fridge? Here’s what you do:
- Unplug the fridge and take off the back panel to get to the compressor.
- The compressor’s at the bottom rear, near the condenser fan motor.
- Look at the compressor for any humming noise. See any oil leaks or burn marks? If it looks good, move on.
- Disconnect the compressor connector by squeezing it and pulling down.
- Grab a multimeter and measure resistance between the pins on the connector.
- For bottom freezer models: it should be 11.5-13 ohms from common to power, and 16-18 ohms from common to save.
- For side-by-side and multi-door models: it should be 6-8 ohms from common to power, and 10.5-12.5 ohms from common to save.
- If the values are off or the compressor doesn’t run, check the overload protector (OLP) and positive temperature coefficient (PTC).
- If the compressor’s bad, you’ll need a new one, like the LG Electronics 4681JB1029B. Check the repair guide for steps on replacing it.
How to Fix Motor Noise in an LG Refrigerator?
1. Clean the Condenser Coils
unplug your fridge and move it away from the wall. You’ll need to get to the back of it.
Find the condenser coils, usually at the bottom rear.

Grab a vacuum with a narrow attachment and suck up all the dust and debris you see on the coils.
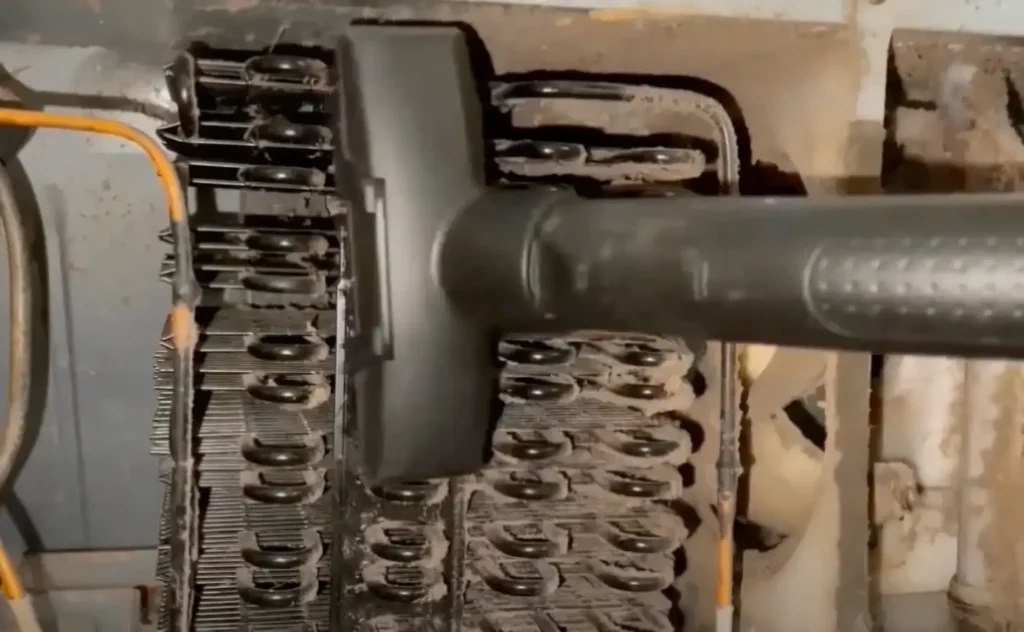
Take a flexible brush and clean between the coils and corners to get rid of the stubborn dirt.
Vacuum again to remove the loosened dirt.
If the coils are still dirty, rinse them gently with cold water. Make sure they’re completely dry before you plug the fridge back in.
Put any panels or toe guards back in place and slide the fridge back to its spot.
Plug the fridge back in and check if it’s working properly.
Clean those coils every 6-12 months. It helps your fridge run better and last longer.
I find it pretty satisfying to see all the dust gone and knowing my fridge is gonna be more efficient!
2. Replace the Evaporator Fan Motor
To change the evaporator fan motor in an LG fridge, here’s what ya need to do:
- Unplug the fridge – Safety first! Don’t skip this step.
- Empty the freezer – Take out all the shelves. Clear space to work.
- Remove the light lens – Push up the tab at the bottom, then lift it off.
- Take out the light bulb – Unscrew it counterclockwise. Easy peasy.
- Remove the top duct – There are screw covers and screws. Take ‘em all out.
- Access the evaporator fan motor – Pull out the air duct to get to the motor.
- Disconnect the wires – Find the evaporator fan motor, then unplug the wires.
- Unscrew the motor – Take out the screws holding the motor and remove it.
- Install the new motor – Put in the new fan motor (part #4681JB1029A), secure it with screws.
- Reconnect everything – Plug the wires back into the new motor.
- Reassemble everything – Put back the air duct, duct, light bulb, and light lens. Do it in reverse order.
- Plug the fridge back in – Make sure it’s working fine.
3. Replace the Condenser Fan Motor
unplug your fridge and turn off the water supply. Safety is key!
Get Access to the Motor:
Take off the lower rear access panel by removing the screws holding it in place.
Use pliers and a flathead screwdriver to gently pull off the fan blades from the motor shaft.
Use a short Phillips head screwdriver to unscrew the motor mounting bracket.
Disconnect the motor’s wire harness and lift out the old motor. Easy peasy!
Install the New Motor:
- Transfer the rubber mounts from the old motor to the new one.
- Position the new motor in the bracket, reconnect the wire harness, and secure it with the screws.
- Slide the fan blades back onto the motor shaft.
- Reattach the access panel with the screws you removed earlier.
- Reconnect the water supply line to the inlet valve and turn the water back on.
- Plug your fridge back in and check to make sure everything’s running smoothly.
4. Replace the Compressor Motor
- Remove the lower rear access panel.
- Cut the compressor tubing at the base with a tubing cutter or dikes.
- Disconnect the compressor wires and take out the compressor.
- Sand the joints on the new compressor for good solder adhesion.
- Attach the compressor plug to the new compressor.
- Position the new compressor and align the tubing.
- Braze the joints with a torch and brazing rods. Pressurize the system with dry nitrogen to check for leaks.
- Use the compressor to create a vacuum in the system.
- Charge the system with the correct refrigerant.
- Reconnect the water supply line and turn the water back on.
- Plug the power cord back in and make sure the refrigerator is working properly.
How to Prevent Motor Noise in an LG Refrigerator?
So, you’ve noticed your LG refrigerator is making some disturbing sounds, huh? Sounds like it’s making a loud racket more suited to a construction site than your kitchen.
Don’t stress! Often, a refrigerator will make more noise than usual due to temperature changes or when it’s trying to stabilize its internal environment, especially after letting in warm air from the outside when one of the doors, possibly the French door, didn’t shut properly.
This sound may occur because the fridge is working overtime to cool down and evaporate the moisture that snuck in.
Another common reason your kitchen pal is making a loud noise could be something to do with what’s happening at the bottom of the fridge.
Sometimes, items or debris can block the drip pan located at the underside of the refrigerator, or even the fan that’s connected to the refrigerator.
This blockage can make the sound louder when the refrigerator is actively cooling down the refrigerator compartment.
To fix this problem, you might need to do a bit of cleaning or reorganizing at the fridge’s base.
If the racket doesn’t stop with your DIY efforts, it might be time to dive into the related help library or consider contacting LG customer (802) 552-4364) support.
They can offer guidance on refrigerator repair or suggest if a specialist needs to take a look.
Remember, noises can be a sign that something’s amiss, but with the right approach, you can get back to enjoying your new refrigerator without needing earplugs every time you walk into the kitchen.