Is your LG fridge acting weird lately? Maybe your food isn’t staying as cold as it should. It could be a worn-out door gasket. Don’t worry, this is a simple fix you can do yourself! I’ll show you how to find the exact replacement part for your fridge and swap it out in no time. Fresher food saved money, and a hero move for your kitchen – all in under an hour! Sounds good, right?
Key Takeaways
- Quick Fix: Replacing a worn-out door gasket on your LG fridge can improve cooling efficiency and save money.
- DIY-Friendly: With basic tools, you can replace the gasket yourself in under an hour.
- Signs of Wear: Check for cracks, gaps, or loss of flexibility in the gasket to determine if replacement is needed.
- Cost: Replacement gaskets typically range from $60 to $100.
LG Refrigerator Door Gasket Replacement Guide – Step by Step 2024(YouTube Tutorial)
If your LG fridge model has a French door or any other, it does not matter, it is easy to replace process. To replace the door gasket seal on an LG fridge door, follow these steps:
Step 1: Confirm the need for replacement
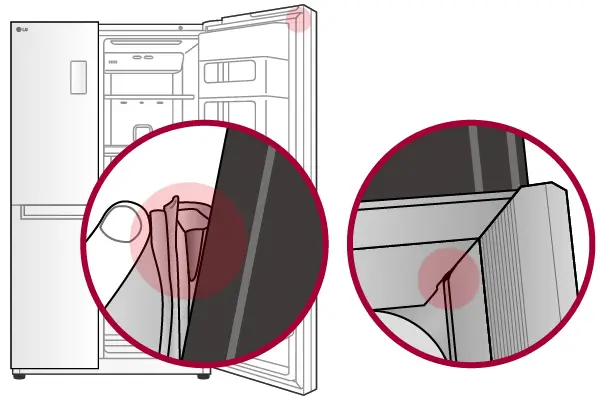
Check the gasket for signs of wear, tear, or damage, such as cracks, gaps, or loss of flexibility.

Step 2: Order a refrigerator door gasket assembly
Find a replacement gasket that matches your LG refrigerator model or part number. You can find various LG refrigerator door gaskets, such as the LG ADX73550624 refrigerator door gasket assembly, in the LG Store, Make sure to choose a genuine OEM replacement to ensure the best fit and quality.
Step 3: Remove the old gasket
- Turn off or unplug the refrigerator.
- Remove the screws or clips holding the gasket in place.
- Carefully pull the gasket out of the track, starting at one corner.
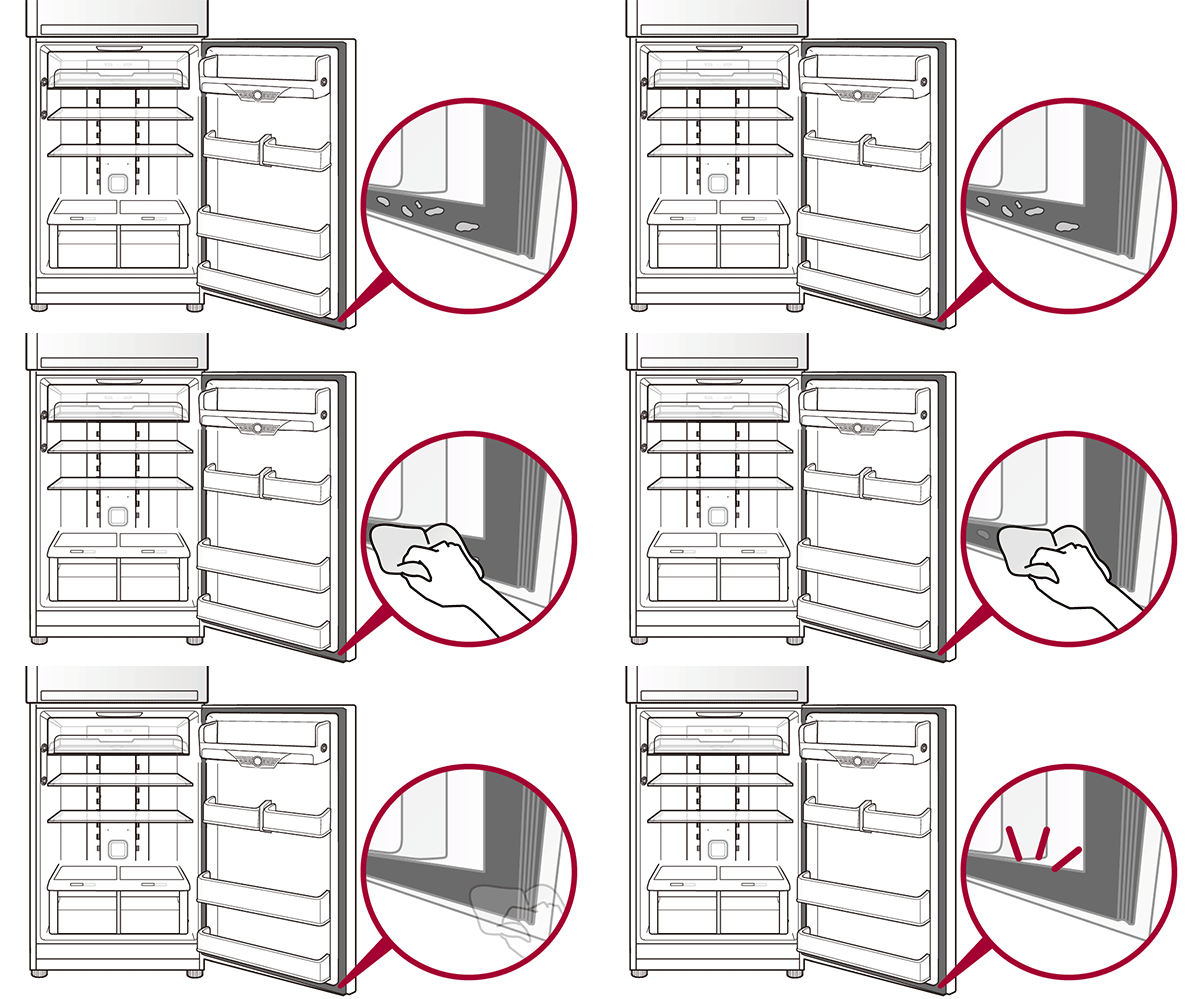
- Clean the track with a damp cloth to ensure a proper fit for the new gasket.
Step 4: Install the new LG fridge door gasket
- Soak the new gasket in warm water to soften it, making it easier to install.
- Position the new gasket, aligning the screw holes with the screws or clips.
- Push the gasket into the door, making sure it is correctly behind the retainer.
- Secure the retainers with the screws or clips.
- Spray the gasket with a small amount of lubricant or use talcum powder to prevent it from sticking to the fridge.
- Close the fridge door and check if the gasket is working correctly by placing a piece of paper between the fridge and the door, and then closing the door before trying to pull the piece of paper out.
Regular cleaning

Clean the gasket regularly to avoid having to change it frequently. Use a small brush to remove debris and a damp cloth with hot soapy water or white vinegar to give the gasket a good clean. Dry the gasket before closing the refrigerator door.
By following these steps, you can successfully replace the gasket seal on your LG refrigerator door.
Why are my LG refrigerator doors not sealing?
I’m here to help you with any issues you might be experiencing with your LG refrigerator door gasket. If you notice any of these signs, it’s time to consider replacing the gasket:
- Torn or worn-out gasket: Look for tears, cracks, or worn-out spots in the seal.
- Rising energy bills: A damaged gasket can cause your refrigerator to work harder, leading to increased energy consumption and higher bills.
- Condensation or frost buildup: Unusually high levels of condensation or frost inside the fridge or freezer might be due to warm air leaking in.
- Spoiling food: If your food is spoiling or thawing out faster than usual, a faulty seal might be letting in warm air.
- Difficulty opening or closing the door: If the door doesn’t close easily or requires extra effort to open, the seal might not be airtight.
To check if your gasket is sealing properly, try the paper test:
- Place a piece of paper between the door and the fridge.
- Close the door.
- Pull the paper out. If it slides out easily, the seal might not be working correctly.
By replacing the gasket, you can prevent warm air from entering your refrigerator, maintain the right temperature, and keep your food fresh. Plus, you’ll save on energy bills and avoid costly repairs down the line.
Can you replace a refrigerator gasket yourself?
Yes, you can replace a refrigerator gasket yourself. It is a task that can be done with basic tools, such as a screwdriver, and the replacement part. The process involves removing the old gasket and installing the new one in its place.
How much does it cost to replace refrigerator door gasket?
The cost to replace a refrigerator door gasket typically ranges from $60 to $100, depending on the size and model of the refrigerator.
How do you Remagnetize a refrigerator door seal?
Remagnetizing a refrigerator door seal is possible, but it is not a recommended solution for most cases. This is because the flexible magnets in refrigerator and freezer door seals are relatively weak and can be demagnetized fairly easily.
FAQs
How can I find the correct model number for my LG refrigerator door gasket assembly?
To find the correct model number for your LG refrigerator door gasket, check the inside of your fridge for a label or sticker that lists the model number. This information can also be found in your refrigerator’s user manual or by contacting LG’s customer support chat for repair help. Knowing the exact model number is crucial for ordering the right door gasket replacement.
Is it difficult to do a DIY LG fridge door seal replacement?
Not at all! With basic tools and a bit of DIY spirit, replacing the LG fridge door seal is quite doable. Many online appliance repair tutorials provide a transcript or step-by-step guides that show you how to remove the old seal and install a new one. Always verify you have the right model number and replacement part before starting, to avoid any mishaps during maintenance.
Can you provide a brief transcript or product information for installing a LG refrigerator door seal?
For installing a LG refrigerator door seal, the product information usually includes cleaning the refrigerator door edge before installation, removing the old door seal, and carefully fitting the new gasket around the door’s perimeter making sure it has no folds or creases. Technical descriptions often advise checking the seal’s function by closing the door on a thin sheet of paper and verifying if it holds tight, indicating a proper seal.
What maintenance tips are there for LG refrigerator door gaskets?
Maintenance tips for LG refrigerator door gaskets include regularly cleaning the gasket with mild detergent and warm water to remove any dirt or grime that could compromise the seal. Inspect the gasket periodically for any signs of wear or damage such as tears or folds. Replacing the gasket at the first sign of damage can prevent more significant repair issues with your appliance.
What kind of feedback do people have after replacing their LG refrigerator door seal?
Many people find that after replacing their LG refrigerator door seal, the appliance’s cooling efficiency improves significantly, leading to better food preservation and reduced energy costs. Users often share positive feedback about the DIY aspect, noting how following a detailed guide or video made the process manageable. However, precise fitting is crucial for success, so patience and careful attention to detail are commonly recommended.
Are there specific tools required for LG refrigerator door gasket replacement?
Generally, only a few basic tools are required for replacing an LG refrigerator door gasket, such as a screwdriver to help pry off the old gasket and perhaps a utility knife if any trimming is necessary. Each model might have slightly different needs, so consulting your fridge’s repair help library or a specific appliance repair tutorial for your model number can provide more accurate information on the tools needed.
How do I know if my LG refrigerator door gasket needs replacing?
Signs that your LG refrigerator door gasket needs replacing include noticeable gaps or looseness when the door is closed, visible tears or cracks in the gasket material, and increased condensation or frost inside the fridge. If your refrigerator seems to be running more frequently or your energy bills have increased, it might also indicate that the door seal is not functioning properly.
